Embarking on a home interior demolition is thrilling yet daunting. Whether tearing down walls for an open floor plan or gutting a room, deciding on demolition services is the crucial first step.
Proper planning and execution are essential to avoid unexpected obstacles, rising costs, and delays. From safety precautions to tool selection, every detail matters for a smooth process.
This guide covers everything you need to know about home interior demolition, including essential preparations, safety gear, tools, and step-by-step processes. It also addresses common challenges like hidden mold and outdated wiring, offering tips on managing debris and thorough cleanup.
Preparing for demolition
Preparation is key to any successful demolition project. Here’s how to start on the right foot.
Evaluate the area you want to demolish. Determine if you’re tearing down a wall, gutting a room, or renovating an entire home. Identify any structural elements, like load-bearing walls, that could complicate things. This assessment guides your decisions.
Check with your local building department to understand required permits, especially for structural changes. Obtaining necessary approvals avoids fines and delays.
Outline each phase, from prep work to cleanup. Factor in potential delays and unexpected issues. Create a comprehensive budget, including tools, permits, labor costs, and a contingency fund. A realistic timeline keeps you on track and reduces stress.
Safety precautions
Safety is paramount in any demolition project. Equip yourself with heavy-duty work gloves, safety goggles, a hard hat, a dust mask or respirator, and steel-toed boots. Ear protection is also crucial for loud tools. Never skimp on safety gear — it’s your first defense against injuries.
Clear the work area of all furniture and appliances. Use plastic sheeting to cover floors and seal doorways to contain dust and debris. Mark the demolition zone with caution tape and ensure adequate lighting.
Handle hazardous materials with care. Homes built before the 1980s might contain asbestos — hire a professional for testing and removal. For mold, stop work and consult a remediation expert. Lead paint requires lead-safe practices like wet sanding and HEPA vacuuming.
Step-by-step demolition process
Ready to get your hands dirty? The step-by-step demolition process transforms your space from old and tired to a blank canvas ready for renovation. Follow these detailed steps to ensure a smooth and efficient teardown.
Disconnecting utilities
Safety first! Begin by disconnecting all utilities to prevent accidents. Turn off the water supply at the main valve to avoid leaks or floods. Next, shut off the gas at the meter to prevent dangerous leaks. Finally, switch off the electricity at the circuit breaker.
Before proceeding, double-check that all appliances and outlets are dead. This step is non-negotiable and will prevent many potential hazards.
Removing fixtures and fittings
With utilities safely disconnected, start removing fixtures and fittings. Begin with light fixtures, carefully unscrewing, and disconnecting wiring. Move on to cabinets, countertops, sinks, and any built-in appliances. Use a screwdriver or drill to remove screws and bolts.
If you plan to reuse or donate any items, handle them carefully to prevent damage. Clearing these elements gives you a clean workspace for the heavier demolition ahead.
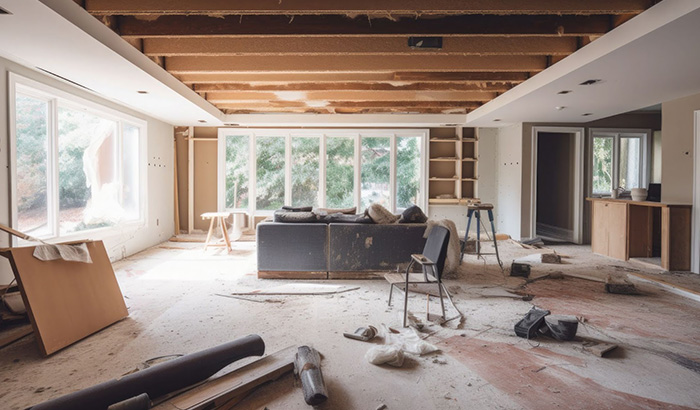
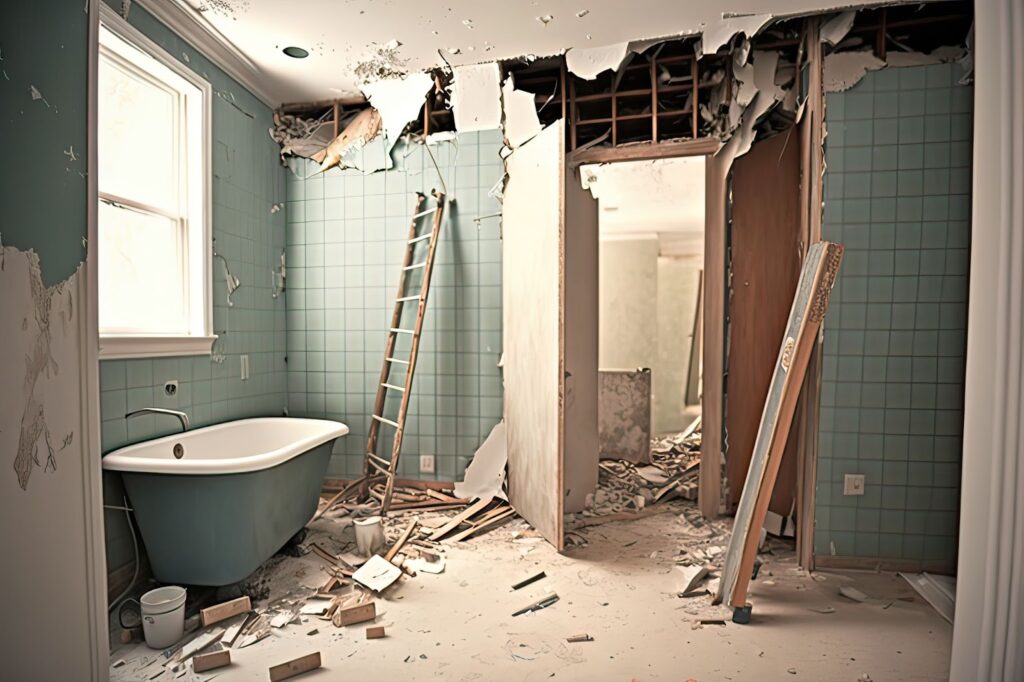
Demolishing walls and partitions
Next up are walls and partitions. Score the surface for drywall with a utility knife, then use a sledgehammer or pry bar to break it into manageable pieces. If you’re dealing with plaster, a reciprocating saw works wonders.
Be mindful of any load-bearing walls — these require professional assessment before removal. As you demolish, look for hidden hazards like mold or outdated wiring. Removing walls opens up your space, giving you a fresh perspective on your renovation.
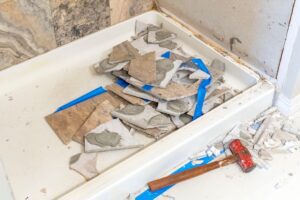
Tearing up flooring and subflooring
Flooring comes next. Start by removing any baseboards or trim. For tile floors, use a chisel and hammer to lift and break up the tiles. Pry up hardwood and laminate floors using a pry bar, while carpet is best cut into strips with a utility knife for easy removal.
Don’t forget to remove the subfloor if it’s damaged or if your renovation requires a fresh base. This step is often physically demanding, so pace yourself and take breaks as needed.
Handling plumbing and electrical components
Finally, address any remaining plumbing and electrical components. For plumbing, cap off any exposed pipes to prevent leaks. Use a wrench to disconnect and remove any remaining fixtures. When dealing with electrical elements, ensure the power is off before removing outlets, switches, or wiring.
If you’re unsure about any electrical work, it’s wise to call in a professional. Proper handling of these components ensures a safe and compliant renovation space.
Managing challenges and post-demolition process
Demolition isn’t simply about brute force; it’s about navigating unexpected challenges with resourcefulness. When surprises like hidden mold or outdated wiring arise, stay calm and act promptly. Mold poses health risks; stop work immediately and call a professional for remediation.
For outdated wiring, avoid DIY fixes. Hire an electrician to ensure safety and compliance with modern codes. Addressing these issues early keeps your renovation on track.
Demolition generates dust and debris. To contain the mess, seal off the work area with plastic sheeting and painter’s tape. Use a shop vacuum regularly to manage dust and position fans to ventilate the space. Sweep and bag debris frequently to maintain a clean and safe workspace. Always wear a dust mask and goggles.
Structural issues like sagging beams or cracked foundations require professional assessment. Attempting to fix these on your own may lead to serious consequences. A structural engineer will provide solutions to maintain your home’s integrity, ensuring your renovation proceeds safely.
Debris disposal and cleanup
A fresh start begins with proper disposal and cleanup. Begin by sorting debris into categories: wood, metal, drywall, tiles, and general waste. Prioritize recycling whenever possible, and hire professionals for hazardous materials like asbestos or lead paint. Renting a dumpster streamlines the disposal process.
Next, salvage reusable materials such as bricks, tiles, and fixtures and donate them to local organizations to give them a second life. Many recycling centers accept a variety of materials, helping to reduce landfill waste and promote eco-friendly practices.
Once you’ve cleared the debris, focus on a thorough cleaning. Use a shop vacuum to eliminate dust and small particles, followed by sweeping and mopping the floors. Don’t overlook cleaning the walls, windows, light fixtures, and air vents. Consider using an industrial air scrubber to ensure the air is clear of particles for extensive projects.
Tips and tricks
Demolition doesn’t have to be lengthy or expensive. You will save time, money, and effort with the right approach and demolition services. Here’s how:
Time-saving demolition hacks
Speed up your demolition with these clever hacks. Always have the right tools on hand. Use a reciprocating saw with a demolition blade to effortlessly cut through wood, metal, and drywall.
For drywall, cut along the edges with a utility knife and then use a sledgehammer for a clean break, making removal easier. Score and break tiles with a hammer and chisel for flooring, then use a floor scraper. Pre-cut carpet into strips for quick removal.
These hacks streamline the process, turning days of work into hours.
Cost-effective strategies
Keep costs down by renting tools instead of buying them if you don’t use them often. Check local tool rental shops for daily or weekly rates. Salvage and sell or donate fixtures, cabinets, and appliances in good condition to offset costs. Shop around for the best rates on dumpster rentals or debris-hauling services.
These strategies significantly reduce expenses without compromising quality.
Best practices from professionals
Learn from the pros to avoid pitfalls and improve efficiency. Start with thorough planning: outline steps, gather materials, and ensure safety measures are in place. Professionals stress the importance of organization; keep your workspace clean and tools organized to prevent accidents and save time.
To avoid mistakes, tackle one task at a time. Use leverage when prying materials apart, minimizing effort and reducing strain.
Implementing these time-saving hacks, cost-effective strategies, and best practices ensures your demolition is quick, efficient, and within budget. By working smarter, not harder, you’ll pave the way for a successful renovation that starts on the right foot.

Trust Cutting Edge Demolition for your interior demolition needs
Embarking on a demolition project may be daunting, but it becomes a rewarding journey with the proper guidance. At Cutting Edge Demolition, we are dedicated to making your demolition experience seamless and efficient. Founded by professionals with diverse construction backgrounds, our mission is to deliver top-notch demolition services focusing on cleanliness, responsiveness, and professionalism.
What sets us apart is our commitment to innovation and client satisfaction. Whether it’s dustless tile removal or large-scale commercial demolition, we execute every project with precision and care. We surpass industry standards, driven by a relentless pursuit of excellence and a customer-centric approach.
Experience the Cutting Edge Demolition difference — where expertise meets innovation. Our team is ready to transform your space with unmatched professionalism and dedication. Contact Cutting Edge today and let us redefine your demolition experience.
kampungbet https://idisurabaya.org/ kampungbet kampungbet kampungbet http://ijm-nasp.unhas.ac.id/public/ kampungbet pragmatic casino kampungbet